Friday, September 14, 2018

Organize, Organize, Organize! (Sessions, Folders, Files)

I think I have always been somewhat organized. But I have learned to be very organized since running my studio. Things can get very unorganized very quickly.

If you want to save yourself some headaches down the road, grab 20-30 mins to take some time when you're not very busy and think about how you want to organize folders, files, sessions, and clients. 

Being able to find a client's session quickly becomes key. For instance, I have one client who came in a few years ago with just one project. As the months and years have gone by she has done a dozen or so different types of projects. I made the mistake of thinking what she was bringing me was a one-time project, so I just threw it in with another of her sessions. I have now done that so many times that when she calls and asks if I have so and so I don't know the answer. She is the exception for me. But her different projects are a MESS!!

So I had to develop a "system" of sorts to stay organized. Here's what I do:

I put the clients' last name first, then first name. So Tom Smith becomes Smith Tom. Bands are simply listed by the name of the band. I always capitalize the main client folder and the main folder for a song (i.e. Smith, Tom).  I usually put a sub-folder inside the client folder with the song title - and I do one folder per song. I do not put multiple songs in the same folder! If they have three songs, they get three folders. The folder for the song I put in caps, like "The Setting Sun". Then the session in that folder becomes settingsun. I always do 'Save As' with the sessions as I get something done, incorporating a number scheme. So the session I put settingsun_01 xxx. With the xxx being what was done during that session, i.e. vocal tracking, eq, rough mix, etc. Then settingsun_02,etc.

Although I don't always do it this way, it's good to know that 'year/month/day' formatted dates sort alphanumerically; 'day/month/year' (UK) and 'month/day/year' (USA) standards do not. 
Think about it: under the UK system, the 1st of December sorts in front of the 2nd of January because 1 comes before 2. And in America Jan the 1st 2008 comes before the December the 1st 2007 because 01 comes before 12.

This works for session files too. Versions of the same day get suffixed a, b, c etc.

Dates are more logical than descriptives like... 'final mix', 'final final mix', 'final final mix THIS ONE', new final mix, 'new new final mix unmastered reverb +EQ' etc., etc. I don't use descriptives this way.

If you use the YYYYMMDD format, they'll sort alphanumerically on a computer and you'll be organized!

I hope this helps!

Peace-
And remember - make it a great day!

Tim
Saturday, September 8, 2018

Compressors 102 (More of the Basics)

After learning the basics about compressors (see Compressors 101 earlier blog entry), then you can use this general guide of the type of overall effect you are going for.

If you want a Natural sound (the compressor is not noticeable):
Use a slower attack (longer than 75 ms) and gentle ratios (less than 2:1). Always allow the compressor to "relax" back to zero several times a measure.

For a Punchy Response:
For a harder, punchier sound, use higher ratios and thresholds, but keep an ear out for any distortion.

If you want a Thick and Dense sound:
For a thicker, denser sound use faster attacks, medium ratios, and lower thresholds. There will be much more gain reduction though.

If you want a Pumping Effect:
For an overstated pumping effect use fast attacks, high ratios, and a longer release time.

DO - Avoid using extreme settings to begin with. This is especially true if you are just trying to control the dynamics.

DON'T - Add compressors to every channel just because you think you're supposed to! Start with minimal compression and carefully choose where, when and why to add a compressor.

DO - Experiment with different kinds of compressors. There can be some big differences!

DON'T - Don't forget to bypass the compressor occasionally to check that you're getting good results.

DO - Remember to balance the output gain so the level doesn't change when you engage the bypass. In other words the before and after volume level should be the same. We hardly ever use compression without changing the output makeup gain. If you add 3 dB of gain reduction (GR), then you should be able to add 3 dB or so of make up gain for the output.

DON'T - Don't be afraid to experiment. Some of the greatest sounds in the history of recorded music came from misused and abused compressors!

Next blog about compressors I will talk about the "Knee" of a compressor! I really do hope this helps. It helped me in the beginning!

As always - Make it a GREAT day!

T

Saturday, September 1, 2018

Creating a Click Track

Using a click track during recording is, of course, imperative. We can't do our work if we can't play to the beat! Luckily for us Pro Tools makes it easy to set up a click track! Just simply go to Track on the menu bar, scroll all the way to the bottom and choose Create Click Track. Pro Tools will create an auxiliary track and automatically put a metronome plugin on the track. The metronome will automatically set to the tempo (bpm) of the song.

The metronome is customizable. You can change the sounds used for beat 1 and all other beats (2, 3, 4, etc.). The volume for beat 1 can be set and the volume for all other beats can be set to something different. I usually have mine set so that beat 1 is louder than other beats and is a different sound. That makes it easy to find the downbeat while tracking.

When I set up my templates, I already have the click track set up and ready to go! Easy! And since I organize and colorize my tracks, for me, the click track is all the way to the left in the Mix window and a bright lime green. I always know where it is in the session, no matter working in the mix or edit window.

Peace! And HEY! Make it a great day!

Tim

Sunday, May 13, 2018

6 Recording Myths - Busted!

It is hard to learn how to record and mix music today. With so much information available on the web, sometimes it is hard to know if the information is true or not - whether it can be trusted or not. Here are six myths that are not true! Ask anyone who really knows his stuff and is experienced and successful.

Myth 1 – You can’t use ribbon mics on loud sources

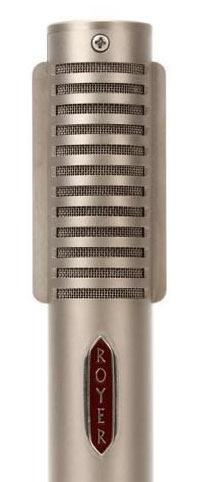
This myth is a good one to start with because like the best myths, there’s just enough of a grain of truth to it to keep it going. It’s true that the actual ribbon element can be more fragile than the diaphragm of a moving coil or condenser microphone. It’s also true that in the early days of ribbon mics, those classic RCA mics from the 1940s would fail readily if you tried to use them on a screaming guitar amp or a kick drum. However, that hasn’t been true for decades. These days, arguably the most venerated guitar cabinet mic, the Royer R-121,  is a ribbon mic. Ribbon mics these days can easily withstand extremely high Sound Pressure Levels (SPL) and can be used on any source. Some ribbon mics such as the Shure KSM313/NE utilize a ribbon made of Roswellite, a substance created using carbon nanofilm technology that is virtually unbreakable and can endure levels up to 146dB SPL.

Myth 2 – Always record as hot as you can

This is another myth that has roots in the early days of recording to tape. Back when your recordings had to stay above the noise floor of the tape, tracking too quietly could render your recording noisy and unusable. Not only that, but recording engineers realized that for rock music, slamming your recording levels produced a very pleasing tape compression and “heat” that could make things sound great. With digital recording, however, both of these are no longer true. With 144dB of dynamic range (24-bit recording) you can even record at -40dB and have 100dB of dynamic range. Early analog-to-digital converters (from decades ago) did sound better when recording near the top of their range but that is no longer the case. In fact, with digital recording, overloading your recording levels is decidedly unpleasant, resulting in a digital distortion when clipping that is ugly and abrasive.

Myth 3 – External digital clocking improves the sound of your audio interface

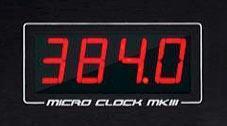
If you’re interconnecting a lot of digital gear you may want to use a master digital clock. Get the best clock you can afford, and make sure everything is connected properly via Word Clock cables. In many cases, the master clock won’t have a drastic influence on the sound; the uniform clocking simply makes everything work together without digital pops and ticks. Just taking your audio interface and hooking it up to an external clock isn’t going to improve the sound quality of its digital-to-analog and analog-to-digital converters unless the clock in your interface is really poor. If you really want to improve your recorded sound, get the best mics, preamps, and audio interface you can. Only buy an external digital clock after you’ve made sure the rest of your audio chain is the best it can be.

Myth 4 – Egg cartons or mattress foam are good acoustic treatments

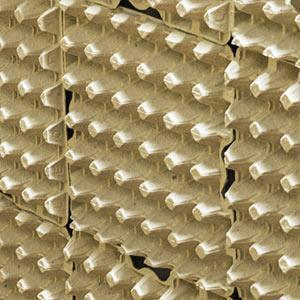
No, not even close! And despite what you may read on the internet, they don’t sound-proof anything. Materials such as drywall, insulation, and acoustic foam can be great acoustic treatment materials. With these materials and proper construction and application methods, you can effectively tackle the two general aspects of studio construction: isolation and acoustics. First, if you’re concerned with keeping sound from getting in or out of your recording space, you’ll need to tackle isolation. This is best done with some form of mass-air-mass construction. A wall with drywall and insulation, empty space, then another identical wall with drywall and insulation will provide a great start. For controlling the acoustics inside your space, you’ll need a combination of absorption and diffusion. There are myriad ways and a long list of proper materials to implement this — egg cartons and mattress foam are NOT on the list!

Myth 5 – External hardware always sounds better than digital plug-ins

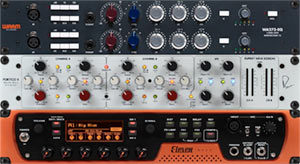
In the early days of digital, this may have been true, but definitely not today. Sure, there are hardware compressors, equalizers, and effects processors with a certain mojo that sound amazing. But there are also digital software processors that sound incredible and offer a level of precision and recall that you’ll never get with external hardware. There’s a reason that nearly every pro studio has a ton of high-quality plug-ins even if they already have and use great outboard gear. You may like the sound of a piece of hardware, but you may like, or even prefer, the sound of a digital processor. The days of digital being second best are far behind us.

Myth 6 – There’s a “correct” way to record

It might seem counter-intuitive after all these “wrong” myths to proclaim that there’s no “right” way. But it’s true! One way of doing things may not get you the results you’re after, but then there are multiple ways that will. The name of the game is experimentation! Never stop experimenting and searching to find techniques that work for you, your music, your musicians, your studio. If you wonder if something will work, even if it seems patently false, give it a go! At worst you’ll need to redo it. At best you may add another unique tool to your toolbox. And that’s what recording is all about!

These are truths that all of us can learn from. I hope this helps musicians and engineers alike get better at their craft!

Peace - and HEY! make it a great day!

T

Friday, February 16, 2018

Compressors 101 - the Basics (part 1)

Compressors seem to confuse a lot of people in the beginning, they certainly did me! Here is some helpful information concerning using a compressor in your mixing to help get you started. I will have other blogs on compression, so keep a look out!

1.  Decide what you want to achieve. There are really only 4 reasons for using a compressor - control a dynamic signal, add punch or impact, change the sound, create an unusual effect. Make a decision on what your goal is, which one of the four you would like to achieve. Keep listening with your final goal always in mind. Here is a neutral starting point: 2:1 ratio; 75 ms attack; 100 ms release.

2.  Overdo to begin with. Pull down the threshold until it starts working. It can be helpful to start with exaggeration. If you're having to turn the threshold way down - boost input level instead. Exaggerating can help get settings right.

3.  Listen. Fine tune settings keeping end goal in mind. Once you get close, adjust the threshold.

4.  Listen again and balance different settings against one another. Higher ratios usually need higher thresholds. Lower ratios usually need lower thresholds.

5.  Experiment. Don't be afraid to change a setting. Just keep listening! Radical amounts are common: 15-20 dB for electric guitars, room mics, drums and even vocals.

For a smoother sound - Use faster attack and higher ratio (But don't lose energy & excitement)
To reduce 'bounce' - Use shorter release time & ease off threshold, or use a lower ratio. Bounce is when you hear the level ducking as the compressor kicks in and then springs back up when it releases.
To add punch - Use a higher ratio, slightly longer attack and shorter release times, but watch out for pumping. Pumping is where the end of the note is louder than the start. Also when adding punch, be careful not to introduce any distortion.

If you add stereo buss compression - be gentle - 1.5:1 and only 2 - 3 dB of gain reduction.

Don't be afraid of using compressors. Experiment with them until you understand them. Try this experiment: print a bass track with heavy compression. Compare the original audio track with the compressed audio track. This will help you understand just exactly what the compressor is doing. You will see a visual representation of what your ears are telling you.

Compressors are a vital part of making music. We use them while tracking, mixing, and many times both tracking and mixing.

I hope this helps! Peace - and as always - make it a GREAT day!

T