It is hard to learn how to record and mix music today. With so much information available on the web, sometimes it is hard to know if the information is true or not - whether it can be trusted or not. Here are six myths that are not true! Ask anyone who really knows his stuff and is experienced and successful.
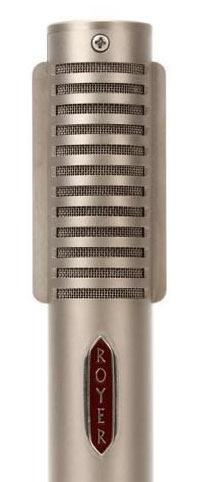 This myth is a good one to start with because like the best myths, there’s just enough of a grain of truth to it to keep it going. It’s true that the actual ribbon element can be more fragile than the diaphragm of a moving coil or condenser microphone. It’s also true that in the early days of ribbon mics, those classic RCA mics from the 1940s would fail readily if you tried to use them on a screaming guitar amp or a kick drum. However, that hasn’t been true for decades. These days, arguably the most venerated guitar cabinet mic, the Royer R-121, is a ribbon mic. Ribbon mics these days can easily withstand extremely high Sound Pressure Levels (SPL) and can be used on any source. Some ribbon mics such as the Shure KSM313/NE utilize a ribbon made of Roswellite, a substance created using carbon nanofilm technology that is virtually unbreakable and can endure levels up to 146dB SPL.
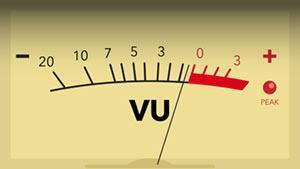 This is another myth that has roots in the early days of recording to tape. Back when your recordings had to stay above the noise floor of the tape, tracking too quietly could render your recording noisy and unusable. Not only that, but recording engineers realized that for rock music, slamming your recording levels produced a very pleasing tape compression and “heat” that could make things sound great. With digital recording, however, both of these are no longer true. With 144dB of dynamic range (24-bit recording) you can even record at -40dB and have 100dB of dynamic range. Early analog-to-digital converters (from decades ago) did sound better when recording near the top of their range but that is no longer the case. In fact, with digital recording, overloading your recording levels is decidedly unpleasant, resulting in a digital distortion when clipping that is ugly and abrasive.
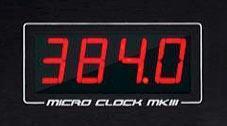 If you’re interconnecting a lot of digital gear you may want to use a master digital clock. Get the best clock you can afford, and make sure everything is connected properly via Word Clock cables. In many cases, the master clock won’t have a drastic influence on the sound; the uniform clocking simply makes everything work together without digital pops and ticks. Just taking your audio interface and hooking it up to an external clock isn’t going to improve the sound quality of its digital-to-analog and analog-to-digital converters unless the clock in your interface is really poor. If you really want to improve your recorded sound, get the best mics, preamps, and audio interface you can. Only buy an external digital clock after you’ve made sure the rest of your audio chain is the best it can be.
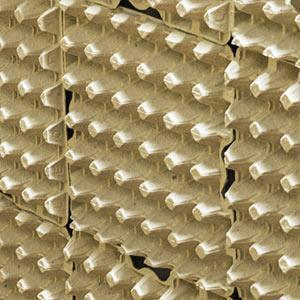 No, not even close! And despite what you may read on the internet, they don’t sound-proof anything. Materials such as drywall, insulation, and acoustic foam can be great acoustic treatment materials. With these materials and proper construction and application methods, you can effectively tackle the two general aspects of studio construction: isolation and acoustics. First, if you’re concerned with keeping sound from getting in or out of your recording space, you’ll need to tackle isolation. This is best done with some form of mass-air-mass construction. A wall with drywall and insulation, empty space, then another identical wall with drywall and insulation will provide a great start. For controlling the acoustics inside your space, you’ll need a combination of absorption and diffusion. There are myriad ways and a long list of proper materials to implement this — egg cartons and mattress foam are NOT on the list!
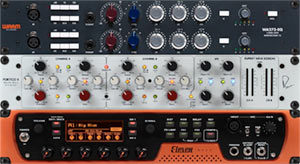 In the early days of digital, this may have been true, but definitely not today. Sure, there are hardware compressors, equalizers, and effects processors with a certain mojo that sound amazing. But there are also digital software processors that sound incredible and offer a level of precision and recall that you’ll never get with external hardware. There’s a reason that nearly every pro studio has a ton of high-quality plug-ins even if they already have and use great outboard gear. You may like the sound of a piece of hardware, but you may like, or even prefer, the sound of a digital processor. The days of digital being second best are far behind us.
 It might seem counter-intuitive after all these “wrong” myths to proclaim that there’s no “right” way. But it’s true! One way of doing things may not get you the results you’re after, but then there are multiple ways that will. The name of the game is experimentation! Never stop experimenting and searching to find techniques that work for you, your music, your musicians, your studio. If you wonder if something will work, even if it seems patently false, give it a go! At worst you’ll need to redo it. At best you may add another unique tool to your toolbox. And that’s what recording is all about!
These are truths that all of us can learn from. I hope this helps musicians and engineers alike get better at their craft!
Peace - and HEY! make it a great day!
T
Myth 1 – You can’t use ribbon mics on loud sources
This myth is a good one to start with because like the best myths, there’s just enough of a grain of truth to it to keep it going. It’s true that the actual ribbon element can be more fragile than the diaphragm of a moving coil or condenser microphone. It’s also true that in the early days of ribbon mics, those classic RCA mics from the 1940s would fail readily if you tried to use them on a screaming guitar amp or a kick drum. However, that hasn’t been true for decades. These days, arguably the most venerated guitar cabinet mic, the Royer R-121, is a ribbon mic. Ribbon mics these days can easily withstand extremely high Sound Pressure Levels (SPL) and can be used on any source. Some ribbon mics such as the Shure KSM313/NE utilize a ribbon made of Roswellite, a substance created using carbon nanofilm technology that is virtually unbreakable and can endure levels up to 146dB SPL.Myth 2 – Always record as hot as you can
This is another myth that has roots in the early days of recording to tape. Back when your recordings had to stay above the noise floor of the tape, tracking too quietly could render your recording noisy and unusable. Not only that, but recording engineers realized that for rock music, slamming your recording levels produced a very pleasing tape compression and “heat” that could make things sound great. With digital recording, however, both of these are no longer true. With 144dB of dynamic range (24-bit recording) you can even record at -40dB and have 100dB of dynamic range. Early analog-to-digital converters (from decades ago) did sound better when recording near the top of their range but that is no longer the case. In fact, with digital recording, overloading your recording levels is decidedly unpleasant, resulting in a digital distortion when clipping that is ugly and abrasive.Myth 3 – External digital clocking improves the sound of your audio interface
If you’re interconnecting a lot of digital gear you may want to use a master digital clock. Get the best clock you can afford, and make sure everything is connected properly via Word Clock cables. In many cases, the master clock won’t have a drastic influence on the sound; the uniform clocking simply makes everything work together without digital pops and ticks. Just taking your audio interface and hooking it up to an external clock isn’t going to improve the sound quality of its digital-to-analog and analog-to-digital converters unless the clock in your interface is really poor. If you really want to improve your recorded sound, get the best mics, preamps, and audio interface you can. Only buy an external digital clock after you’ve made sure the rest of your audio chain is the best it can be.Myth 4 – Egg cartons or mattress foam are good acoustic treatments
No, not even close! And despite what you may read on the internet, they don’t sound-proof anything. Materials such as drywall, insulation, and acoustic foam can be great acoustic treatment materials. With these materials and proper construction and application methods, you can effectively tackle the two general aspects of studio construction: isolation and acoustics. First, if you’re concerned with keeping sound from getting in or out of your recording space, you’ll need to tackle isolation. This is best done with some form of mass-air-mass construction. A wall with drywall and insulation, empty space, then another identical wall with drywall and insulation will provide a great start. For controlling the acoustics inside your space, you’ll need a combination of absorption and diffusion. There are myriad ways and a long list of proper materials to implement this — egg cartons and mattress foam are NOT on the list!Myth 5 – External hardware always sounds better than digital plug-ins
In the early days of digital, this may have been true, but definitely not today. Sure, there are hardware compressors, equalizers, and effects processors with a certain mojo that sound amazing. But there are also digital software processors that sound incredible and offer a level of precision and recall that you’ll never get with external hardware. There’s a reason that nearly every pro studio has a ton of high-quality plug-ins even if they already have and use great outboard gear. You may like the sound of a piece of hardware, but you may like, or even prefer, the sound of a digital processor. The days of digital being second best are far behind us.Myth 6 – There’s a “correct” way to record
It might seem counter-intuitive after all these “wrong” myths to proclaim that there’s no “right” way. But it’s true! One way of doing things may not get you the results you’re after, but then there are multiple ways that will. The name of the game is experimentation! Never stop experimenting and searching to find techniques that work for you, your music, your musicians, your studio. If you wonder if something will work, even if it seems patently false, give it a go! At worst you’ll need to redo it. At best you may add another unique tool to your toolbox. And that’s what recording is all about!These are truths that all of us can learn from. I hope this helps musicians and engineers alike get better at their craft!
Peace - and HEY! make it a great day!
T

